
 Every year, an average family wastes about $350 on air vents in the walls and windows. Interestingly, for roughly the same amount you can fix many of these leaks on your own. By plugging the cracks, you not only conserve energy but also increase your comfort level.
Start from the attic. That space in the roof may contain many cracks through which air can leak into the house. Once you have fixed the attic, you need to tackle the basement. Prevent cold air from the basement from getting sucked into the rooms upstairs. Finally seal all other air leaks you can find in other parts of the house.
Insulate areas around recessed lights
Recessed lights tend to have small vents opening into the attic. Since these vents allow cooled and heated air to escape, you need to plug them. A typical home may have around 40 fixtures of these kinds, so it is easy to understand why they are the leading cause of air leaks in and around the house. Look for lights that do not carry the label ICAT and insulate the areas around them. You can quickly fix this problem with an airtight baffle. Remove the bulb, insert baffle into the housing, and replace the bulb.
Close all open stud cavities
In many old houses, the living space is not separated from the unheated areas with a layer of plaster. Close all open stud cavities with fiberglass insulation (unfaced) rolled into large plastic garbage bags. Large gaps can be closed with drywall scraps. Or you can use reflective foil insulation.
Seal gaps around chimneys
According to building codes, wood framing should be at least 1 inch away from metal chimney flues. In the case of brick chimneys, the required gap is 2 inches. However, air can flow in through these gaps. You can cover these openings with aluminum flashing of the appropriate size. Seal it into place with hot silicone caulk.
Seal the attic hatch
If there are gaps around attic hatch seal them by installing foam weather stripping around the outer edge of the opening in the hatch. Gaps around attic stairs can be sealed with caulking.
Squirt foam in medium-size openings
Once you have fixed the largest attic gaps, you can move on to medium-size gaps such as those found around plumbing pipes. Use low-expansion polyurethane foam for plugging openings less than 3 inches in width.
Caulk the tiny gaps
Tiny gaps can be sealed using caulk. Silicone caulk may be a bit expensive but it is the best. Also it works in areas where there are extreme temperatures.
Plug cracks in the basement
There may be gaps in the foundation wall. To prevent air leak you only need to fix gaps above the soil. You can seal these gaps using caulk and spray foam. Use caulk for gaps less than ¼ inch in width. For larger gaps, use spray foam.
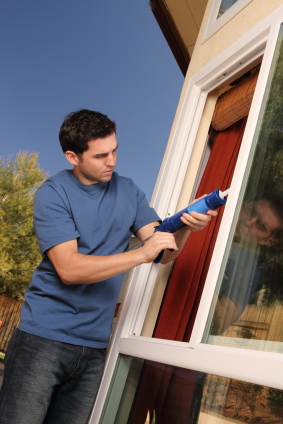
Tighten up openings around doors and windows
There may be gaps around doors and windows. Tighten them up with caulking or weatherstripping. Bronze weatherstripping may last for decades but installing them is not easy. Plastic weatherstrippings are easy to install but they are not durable.
While working in the attic, wear protective gear including gloves, disposable clothes, and half-face respirator. Move up all the material you need before starting. Do not touch vermiculite insulation before getting it checked for asbestos.
Thinking about refinancing? You can find lenders that can help you with a refinance on your home loan. Let The Home Loan Advisor help you today! As an added part of service, you can get a free home valuation report from Neighborhood IQ and find out what your home is really worth!